Uncle Ben’s Rice is a trusted brand offering high-quality, convenient rice products. As part of Mars Food, it provides parboiled rice options that are easy to prepare and nutrient-rich, catering to diverse dietary needs while ensuring flavorful meals.
1.1 Overview of Uncle Ben’s Rice Products
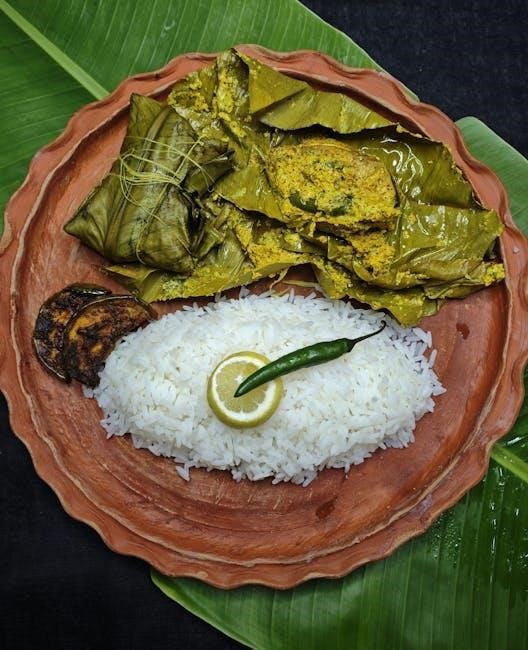
Uncle Ben’s offers a variety of convenient rice products, including parboiled, whole grain, and ready-to-heat options. Their lineup features long-grain white rice, brown rice, and flavored medleys. The rice is pre-cooked using a unique steam process, ensuring faster cooking times. Products like Ready Rice pouches provide quick meal solutions, while the original parboiled rice is enriched with iron, thiamin, and folate, catering to diverse tastes and dietary preferences.
1.2 Importance of Proper Cooking Instructions
Proper cooking instructions are vital for achieving the perfect texture and flavor of Uncle Ben’s Rice. Following the guidelines ensures the rice is neither undercooked nor overcooked, maintaining its quality. Correct preparation also preserves the rice’s nutritional benefits, such as iron and B vitamins. Adhering to the instructions guarantees a consistent result, whether using the stovetop, microwave, or oven, making it easy to enjoy a delicious meal every time.

Understanding the Product
Uncle Ben’s Rice, a Mars Food brand since 1977, offers parboiled rice with essential nutrients like iron and B vitamins, ensuring a wholesome meal solution.
2.1 Types of Uncle Ben’s Rice Varieties
Uncle Ben’s offers a range of rice varieties, including Original Long Grain, Whole Grain, and Ready Rice. These options cater to different tastes and dietary preferences, ensuring versatility in meal preparation while maintaining the brand’s signature quality and convenience.
2.2 Key Ingredients and Nutritional Information
Uncle Ben’s Rice primarily contains enriched long grain parboiled rice, with added iron, thiamin, and folic acid for nutritional enhancement. The ingredients also include sunflower oil, salt, and water for flavor and texture. Each serving provides essential nutrients like carbohydrates, fiber, and minerals, making it a healthy choice; The rice is low in fat and cholesterol-free, aligning with balanced dietary preferences and offering versatility for various recipes.
Essential Materials Needed
Essential materials include a medium skillet, microwave-safe dish, measuring cups, and utensils like a spoon or stirrer for easy preparation and serving.
3.1 Cooking Utensils and Equipment
To prepare Uncle Ben’s Rice, you’ll need a medium-sized skillet for stovetop cooking or a microwave-safe dish for microwave preparation. Additional tools include a measuring cup for water, a spoon or stirrer for mixing, and a lid to cover the dish during cooking. For oven cooking, a heat-resistant oven-safe container is recommended. Ensure all utensils and equipment are clean and suitable for the cooking method chosen to achieve the best results.
3.2 Measuring Tools for Accurate Preparation
A measuring cup is essential for accurately portioning water and rice. For stovetop or microwave methods, use a 1:2 ratio of rice to water. A tablespoon or teaspoon can add seasonings or oils. Ensure all measurements are precise to avoid over- or undercooked rice. Using a clear measuring cup helps monitor water levels during preparation, while a flat edge spoon aids in leveling ingredients for consistent results every time.
Stovetop Cooking Method
Rinse rice, combine with water in a saucepan, and bring to a boil. Reduce heat, cover, and simmer until water is absorbed for fluffy, perfectly cooked rice.
4.1 Step-by-Step Instructions for Stovetop Preparation
Rinse the rice thoroughly in a fine mesh strainer. In a medium saucepan, combine 1 cup of Uncle Ben’s Rice with 2 cups of water. Place on high heat and bring to a boil. Once boiling, reduce the heat to low, cover with a tight-fitting lid, and simmer for 15-20 minutes. Turn off heat and let sit, covered, for 5 minutes. Fluff with a fork before serving for a perfect, fluffy texture.
4.2 Tips for Achieving Perfect Texture
- Use the correct water ratio: 2 cups of water for every 1 cup of Uncle Ben’s Rice.
- Avoid lifting the lid during cooking to prevent steam from escaping.
- Once cooked, let the rice sit, covered, for 5 minutes to allow grains to separate evenly.
- Fluff gently with a fork after resting to ensure a light, fluffy texture.
- Avoid over-stirring, as this can make the rice sticky or mushy.
These steps ensure perfectly cooked, fluffy rice every time.
Microwave Cooking Instructions
Cooking Uncle Ben’s Rice in the microwave is quick and easy. Combine 1 cup of rice with 2 cups of water in a microwave-safe dish. Cover, cook on high for 10-15 minutes, and let stand until water is absorbed for fluffy results.
5.1 Guidelines for Microwave-Safe Preparation
To prepare Uncle Ben’s Rice in the microwave, combine 1 cup of rice with 2 cups of water in a microwave-safe dish. Cover the dish with a lid or microwave-safe plastic wrap. Cook on high for 10-15 minutes, or until the water is absorbed. Let the rice stand for 5 minutes before fluffing with a fork. Ensure the dish is microwave-safe to prevent damage or hazards during cooking. This method ensures quick, even cooking for perfect results.
5.2 Adjusting Cooking Time and Power Levels
Cooking time and power levels may vary based on your microwave’s wattage. Start with 10-15 minutes on full power for 1 cup of rice. Check after 10 minutes; if water remains, continue in 1-minute increments. For lower power levels, increase cooking time accordingly. Let the rice stand covered for 5 minutes after cooking to ensure even absorption. Adjustments ensure perfectly cooked rice tailored to your microwave’s specific performance.
Oven Cooking Method
Preheat your oven to 375°F (190°C). Combine rice, water, and seasonings in a greased dish. Bake for 25-30 minutes until water is absorbed for perfectly cooked rice.
6.1 Preparing Uncle Ben’s Rice in the Oven
Preheat your oven to 375°F (190°C). In a greased, oven-safe dish, mix 1 cup of Uncle Ben’s Rice with 2 cups of water and optional seasonings. Cover tightly with a lid or foil. Bake for 25-30 minutes until water is fully absorbed and rice is tender. Avoid opening the lid during cooking to ensure even steam distribution. Once done, let it rest for 5 minutes before serving for fluffy results.
6.2 Benefits of Oven Cooking for Large Quantities
Oven cooking is ideal for preparing large batches of Uncle Ben’s Rice, ensuring even heating and consistent results. It frees up stovetop space, allowing for simultaneous preparation of other dishes. The oven method also helps prevent the rice from becoming mushy, a common issue with stovetop cooking for large groups. Simply adjust water ratios and monitor to avoid drying out, ensuring perfectly cooked rice for gatherings or meal prep.
Pressure Cooker Instructions
Cooking Uncle Ben’s Rice in a pressure cooker is quick and efficient. Use a 1:1 rice-to-water ratio, cook for 5-7 minutes, and allow natural pressure release for fluffy results.
7.1 Quick Cooking with a Pressure Cooker
Cooking Uncle Ben’s Rice in a pressure cooker is efficient and fast. Simply add a 1:1 ratio of rice to water. Secure the lid and cook for 5-7 minutes. Allow natural pressure release for 5 minutes to ensure fluffy texture. This method retains nutrients and flavor, making it ideal for quick meals with minimal effort and time.
7.2 Safety Precautions for Pressure Cooking
When using a pressure cooker for Uncle Ben’s Rice, ensure the lid is securely sealed to avoid steam bursts. Keep children away and never force the lid open. Allow natural pressure release to prevent scalding. Avoid overheating, as it may cause explosions. Place the cooker on a stable, heat-resistant surface. Use the correct water ratio to prevent clogging the valve. Regularly inspect the gasket and valve for damage. Always follow the manufacturer’s guidelines for safe operation.

Tips for Perfect Cooking
For perfect results, follow package guidelines, use the right water ratio, and avoid overcrowding the pot. Stir gently and use a non-stick pan if possible.
8.1 Avoiding Common Mistakes
To achieve perfect results, avoid rinsing Uncle Ben’s Rice, as it can remove nutrients. Use the recommended water ratio to prevent mushiness. Don’t lift the lid while cooking, as this releases steam. Stir gently to avoid breaking grains. Overheating can dry out the rice, so monitor the temperature and cooking time closely. These simple steps ensure fluffy, flavorful rice every time.
8.2 Enhancing Flavor with Additional Ingredients
Enhance Uncle Ben’s Rice by adding flavor with simple ingredients. Sauté garlic, onions, or herbs before cooking for aromatic notes. Mix in bouillon cubes or spices for added depth. Stir in vegetables, meats, or soy sauce for a savory twist. These additions elevate the dish, making it more vibrant and customizable to your taste preferences while maintaining the convenience of Uncle Ben’s Rice.
Health Considerations
Uncle Ben’s Rice is a nutrient-rich option, offering iron, thiamin, and folic acid. It’s low in fat and cholesterol, making it a healthy choice for balanced meals.
9.1 Nutritional Benefits of Uncle Ben’s Rice
Uncle Ben’s Rice is enriched with essential nutrients like iron, thiamin, and folic acid, making it a healthy choice. It is low in fat and cholesterol, supporting heart health. The parboiled process retains most of the grain’s natural nutrients, providing sustained energy. This makes it an excellent option for balanced diets, catering to various nutritional needs while offering a flavorful meal solution.
9.2 Special Dietary Options and Alternatives
Uncle Ben’s Rice offers gluten-free options, making it suitable for those with gluten intolerance. The parboiled rice is low in fat and cholesterol, ideal for heart-healthy diets. Vegetarian and vegan-friendly, it provides a versatile base for plant-based meals. For added nutrition, whole grain varieties are available, offering more fiber and nutrients. These options cater to diverse dietary needs, ensuring everyone can enjoy Uncle Ben’s Rice while maintaining their health goals.
Storage and Reheating
Store Uncle Ben’s Rice in an airtight container in a cool, dry place. For reheating, add a splash of water, cover, and warm gently in a microwave or pan until steamed through.
10.1 Proper Storage Techniques
Proper storage ensures Uncle Ben’s Rice remains fresh. Store in an airtight container or original packaging in a cool, dry place away from direct sunlight. Avoid moisture and humidity to prevent spoilage. For cooked rice, refrigerate within two hours of cooking and use within three to five days. Freeze for longer storage, up to three months. Always reheat thoroughly before consumption for food safety.
10.2 Safe Reheating Practices
To safely reheat Uncle Ben’s Rice, use a microwave or skillet. Add a tablespoon of water to prevent drying. Heat on low to medium heat, stirring occasionally, until steaming hot. In the microwave, reheat for 1-2 minutes in a covered dish. Ensure the rice reaches 165°F (74°C) to avoid foodborne illness. Never reheat rice more than once and always check for a fresh, steamy appearance before serving.
Safety Tips
Always handle hot cookware with oven mitts or tongs. Ensure proper hydration during cooking to prevent sticking. Keep children away from hot surfaces and appliances while preparing Uncle Ben’s Rice.
11.1 Handling Hot Cookware Safely
Always use oven mitts or tongs to handle hot pans and rice cookers. Never leave hot cookware unattended, especially around children. Keep a safe distance from hot surfaces to prevent burns. Ensure all handles are turned away from the front of the stove. Use trivets or heat-resistant mats to protect countertops. Avoid touching hot cookware directly, even with towels, as steam can cause burns. Prioritize caution to maintain a safe cooking environment.
11.2 Preventing Foodborne Illness
Prevent foodborne illness by ensuring all utensils and hands are clean before handling rice. Store cooked rice in a sealed container at room temperature for up to 2 days or refrigerate for up to 5 days. Reheat rice thoroughly to an internal temperature of 165°F (74°C). Avoid leaving cooked rice at room temperature for extended periods, as bacteria can multiply rapidly. Always use clean serving utensils and containers to maintain hygiene.
Uncle Ben’s Rice offers a convenient and nutritious option for meals. With proper preparation and storage, it ensures delicious and safe results every time. Enjoy!
12.1 Summary of Key Cooking Points
Cooking Uncle Ben’s Rice requires precise water ratios and gentle heat. For stovetop, combine 1 cup rice with 2 cups water, bring to a boil, then simmer. Microwave instructions vary by quantity but typically involve 3-4 minutes per cup. Oven and pressure cooker methods offer alternatives for larger batches or faster results. Always rinse rice beforehand and avoid overcrowding pots for even cooking. Monitor heat to prevent burning and ensure fluffy texture. Proper storage and reheating maintain quality and safety.
12.2 Final Tips for Enjoying Uncle Ben’s Rice
Enhance your meals by adding herbs, spices, or vegetables during cooking. For extra flavor, mix in butter, olive oil, or broth. Experiment with seasonings like turmeric or paprika for vibrant colors. Pair Uncle Ben’s Rice with proteins, sauces, or roasted vegetables for a balanced dish. Store leftovers in airtight containers and reheat safely for future meals. Always follow proper food safety guidelines to ensure freshness and quality. Enjoy the versatility and convenience of Uncle Ben’s Rice in your everyday cooking!
Additional Resources
Visit Uncle Ben’s official website for detailed recipes and cooking guides. Check online retailers like Amazon for product availability and accessories to enhance your cooking experience.
13.1 Where to Find More Information
For more information on Uncle Ben’s Rice, visit their official website, which offers detailed cooking guides, recipes, and nutritional facts. You can also find resources on Amazon, where Uncle Ben’s products are widely available. Additionally, Mars Food’s official website provides insights into the brand’s history and business strategies. Community forums and cooking blogs often share tips and tricks for preparing Uncle Ben’s Rice. Always rely on official sources for accurate and reliable information.
13.2 Recommended Tools and Accessories
For optimal cooking, use a rice cooker, non-stick skillet, or microwave-safe dish. Measuring cups and spoons ensure accurate water ratios. A spatula and lid are essential for stirring and retaining moisture. These tools can be found at kitchen supply stores or online retailers like Amazon. Investing in quality cookware enhances the cooking experience and ensures perfectly prepared Uncle Ben’s Rice every time. Always choose durable, easy-to-clean accessories for convenience.