The Safety 1st Thermometer is a user-friendly, reliable device designed for accurate temperature measurement. It allows easy switching between Celsius and Fahrenheit, ensuring convenience for all users.
1.1 Overview of the Safety 1st Thermometer
The Safety 1st Thermometer is a reliable and user-friendly device designed for accurate temperature measurement. It offers the convenience of switching between Celsius and Fahrenheit, catering to diverse user preferences. With a compact and durable design, it is ideal for home use, ensuring precise readings for both children and adults. The thermometer features a memory recall function, allowing users to track temperature history effortlessly. Its intuitive interface and clear display make it easy to operate, even for first-time users. Designed with safety in mind, it adheres to strict guidelines to ensure reliable performance. Whether for medical or everyday use, the Safety 1st Thermometer provides a practical solution for monitoring temperatures effectively.
1.2 Importance of Temperature Measurement
Accurate temperature measurement is crucial for monitoring health, particularly for detecting fevers in children and adults. The Safety 1st Thermometer provides reliable readings, essential for early detection of potential health issues. Its ability to switch between Celsius and Fahrenheit ensures compatibility with diverse user preferences, making it a versatile tool for global use. Precise temperature monitoring aids in diagnosing and managing illnesses effectively. For parents, this device offers peace of mind by providing quick and accurate readings, helping to ensure the well-being of their families. Regular temperature checks can prevent complications by identifying abnormalities early, highlighting the importance of a dependable thermometer in every household.
1.3 Key Features of the Safety 1st Thermometer
The Safety 1st Thermometer boasts several standout features, including its ability to switch between Celsius and Fahrenheit with ease. It offers memory recall functionality, allowing users to track previous readings. The device is designed for safety, with clear instructions to prevent misuse. Its intuitive interface ensures quick and accurate measurements, making it ideal for both home and professional use. The thermometer also features a durable design, ensuring long-term reliability. Additionally, it includes important safety precautions, such as alerts for high temperatures, providing users with immediate feedback. These features combine to make the Safety 1st Thermometer a practical and essential tool for monitoring health and ensuring accurate temperature readings.
Understanding Temperature Scales
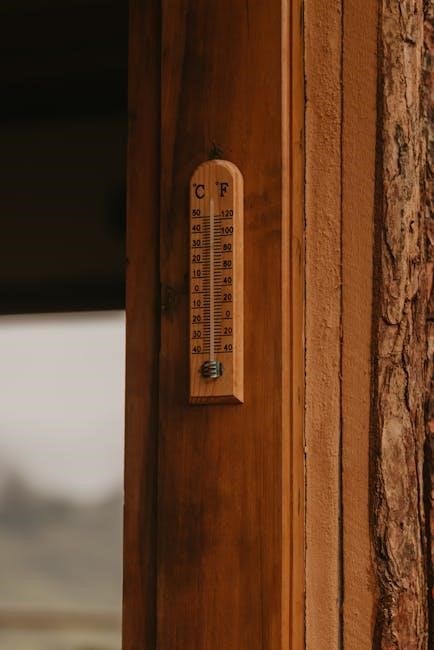
Celsius and Fahrenheit are the primary temperature scales used globally. Celsius is widely adopted in scientific and international contexts, while Fahrenheit remains common in the United States.
2.1 What is Celsius?
Celsius is a temperature scale based on the freezing and boiling points of water, with 0°C and 100°C as reference points. It is widely used in scientific and international contexts.
2.2 What is Fahrenheit?
Fahrenheit is a temperature scale developed by Daniel Fahrenheit, with water freezing at 32°F and boiling at 212°F. It is commonly used in the United States for weather and everyday applications. The Safety 1st Thermometer supports this scale, allowing users to switch between Celsius and Fahrenheit for convenience. This feature ensures that measurements can be understood by individuals accustomed to either system. The scale is a cornerstone of temperature measurement in many contexts, making it a vital part of the thermometer’s functionality. Its inclusion in the Safety 1st Thermometer highlights the device’s adaptability to user preferences and regional standards.
2.3 Why Switch Between Celsius and Fahrenheit?
Switching between Celsius and Fahrenheit allows users to choose their preferred temperature scale, enhancing readability and understanding. Celsius is widely used globally, while Fahrenheit remains common in the U.S. The Safety 1st Thermometer supports this feature to accommodate diverse user preferences; This flexibility ensures measurements are clear and relatable, whether for health monitoring or environmental assessments. Additionally, it enables users to align with regional standards or personal familiarity, making the device more versatile. The ability to toggle between scales is a practical feature that improves usability and convenience for a broader audience, ensuring accurate and accessible temperature readings in any context.

Setting Up Your Safety 1st Thermometer
Insert batteries, power on, and calibrate for accurate readings. Follow instructions to ensure proper function and precise temperature measurements every time.
3.1 First Use Instructions
Before using your Safety 1st Thermometer, ensure all components are included and batteries are properly installed. Press the START button to power on the device; If the thermometer is not in your preferred unit (Celsius or Fahrenheit), press and hold the MODE button until the desired unit appears. For accurate readings, calibrate the thermometer according to the manufacturer’s instructions. If the device is stuck on a specific unit, reset it by removing and reinserting the batteries. Always refer to the user manual for detailed setup and calibration steps to ensure precise temperature measurements. Proper initialization guarantees reliable performance and accurate results for all future use.
3.2 Installing Batteries
Installing batteries in your Safety 1st Thermometer is a straightforward process. Open the battery compartment, usually located at the back or bottom of the device, by sliding it open or using a small screwdriver. Insert the required batteries (typically AAA or LR44) ensuring the positive and negative terminals align correctly. Close the compartment securely to avoid any power issues. After installation, press the START button to turn on the thermometer. If the device does not power on, check the battery polarity or try replacing the batteries. Proper installation ensures reliable performance and accurate temperature readings in both Celsius and Fahrenheit modes. Always use high-quality batteries for optimal functionality.
3.3 Initial Setup and Calibration
After installing the batteries, perform the initial setup by turning on the thermometer. Ensure the device is in the correct mode (body or object) and select the desired temperature scale (Celsius or Fahrenheit). Calibration is crucial for accuracy. Place the thermometer in an environment with a known temperature, such as room temperature (around 20°C/68°F), and let it stabilize for a few minutes. If necessary, refer to the user manual for specific calibration steps. Proper calibration ensures precise readings, whether using Celsius or Fahrenheit. Once calibrated, your Safety 1st Thermometer is ready to provide reliable temperature measurements, enhancing safety and convenience in various applications.

Operating the Thermometer
Operating the Safety 1st Thermometer is straightforward. Press and hold the power/measure button to switch between Celsius and Fahrenheit. Ensure the correct mode is selected for accurate readings.
4.1 How to Take Measurements
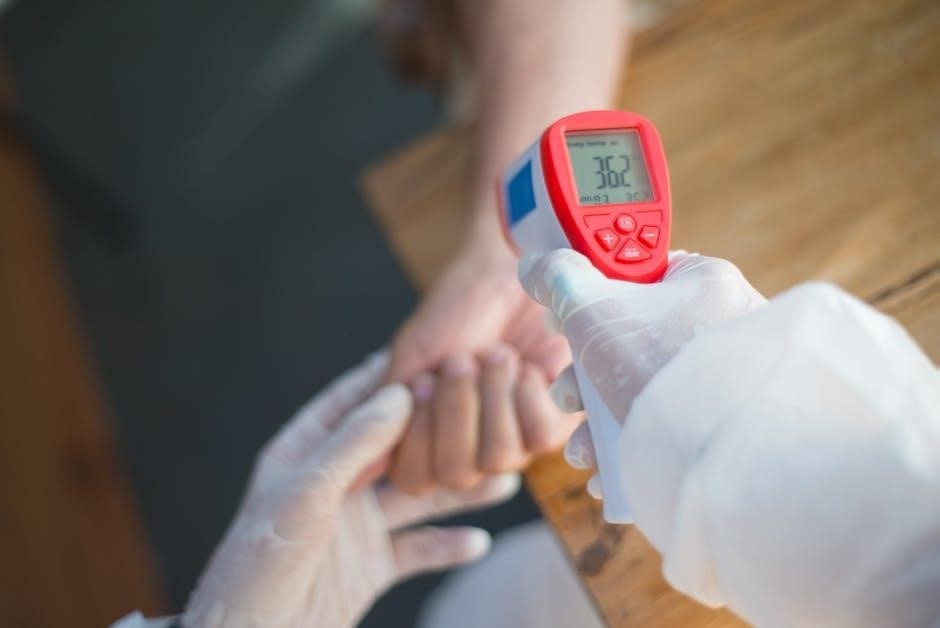
To take accurate measurements with your Safety 1st Thermometer, ensure it is turned on and set to the correct mode (e.g., forehead or object mode). Gently place the sensor on the forehead or object surface, following the manufacturer’s guidance for proper positioning. Press and hold the measure button until the reading stabilizes. The thermometer will display the temperature in either Celsius or Fahrenheit, depending on your settings. For forehead measurements, ensure the area is clean and dry for optimal accuracy. If using object mode, avoid touching hot surfaces directly. Always refer to the user manual for specific instructions tailored to your model, such as the Safety 1st TH074 or TH106. This ensures reliable and precise temperature readings every time.
4.2 Switching Between Celsius and Fahrenheit
To switch between Celsius and Fahrenheit on your Safety 1st Thermometer, start by ensuring the device is turned off. Locate the MODE button, typically found on the top or side of the thermometer. Press and hold the MODE button for 2-3 seconds until the display shows either “°C” or “°F.” Release the button once the desired scale is displayed. This process will not affect previous measurements stored in memory. For models like the Safety 1st TH074 or TH106, this method ensures a quick and seamless transition between temperature scales. Always verify the scale before taking a new measurement to ensure accuracy. This feature is especially useful for users who need to switch between units frequently.
4.3 Using Memory Recall Function
The Safety 1st Thermometer features a memory recall function that allows users to review previously recorded temperature measurements. To access this feature, press and hold the MEMORY button until the display shows the stored reading. The device typically stores the last measurement taken, providing a convenient way to track temperature changes over time. For models like the Safety 1st TH074, the memory function can be accessed while the thermometer is turned on or off, depending on the specific design. Some models may require cycling through the memory by pressing the button multiple times. Always refer to your user manual for specific instructions, as the number of stored readings may vary by model.
Safety Precautions
Handle the thermometer with care to avoid damage. Keep it away from open flames or extreme temperatures. Store safely out of children’s reach and follow manual guidelines.
5.1 Important Safety Instructions
To ensure safe and accurate use of the Safety 1st Thermometer, follow these guidelines:
- Read the user manual thoroughly before first use to understand proper operation.
- Avoid exposing the thermometer to extreme temperatures or open flames.
- Keep the device out of reach of children to prevent accidental damage or misuse.
- Do not submerge the thermometer in water, as it may damage the internal components.
- Ensure batteries are installed correctly to avoid malfunction.
- Store the thermometer in a dry, cool place when not in use;
- Regularly check for wear and tear, and replace batteries as needed.
Adhering to these precautions will ensure accurate measurements and extend the lifespan of your thermometer.
5.2 Handling the Thermometer Safely
Proper handling of the Safety 1st Thermometer is essential for accurate measurements and longevity. Always avoid exposing the device to extreme temperatures, such as direct sunlight or open flames, which may damage its internal components. When not in use, store the thermometer in a dry, cool place, away from children. Clean the device regularly with a soft cloth and mild soap to prevent contamination. Avoid submerging it in water, as this can cause irreversible damage; Ensure batteries are securely installed to maintain proper function. By following these guidelines, you can ensure safe handling and reliable performance of your Safety 1st Thermometer.
5.3 When to Consult a Professional
If your Safety 1st Thermometer displays persistent errors, such as inconsistent readings or malfunctioning buttons, it may be time to consult a professional. Seek assistance if the device shows signs of physical damage or if measurements seem inaccurate despite proper calibration. Additionally, if the thermometer repeatedly displays “H” for high temperatures beyond its range, professional inspection is recommended. For issues like battery drain or failure to switch between Celsius and Fahrenheit, consulting the user manual or contacting customer support is advised. A professional can diagnose and resolve complex problems, ensuring your thermometer functions accurately and safely for future use.
Troubleshooting Common Issues
Common issues include the thermometer getting stuck in Celsius or Fahrenheit, displaying high temperature readings, or malfunctioning buttons. Resetting the device often resolves these problems quickly.
6.1 Temperature Reading Too High
If your Safety 1st Thermometer displays a temperature reading that is too high, it may indicate an issue with the device or environmental factors. Ensure the thermometer is not exposed to extreme temperatures, as this can cause inaccurate readings. Check if the ambient temperature exceeds the device’s maximum range, which is typically 43°C / 109.4°F in body mode or 99.9°C / 211.8°F in object mode. If the reading is too high, reset the thermometer by removing and reinserting the batteries. This often resolves the issue. Always refer to the user manual for specific guidance on resolving high-temperature errors and ensuring accurate measurements. Proper usage and calibration are key to avoiding such problems.
6.2 Resetting the Thermometer
Resetting your Safety 1st Thermometer is a straightforward process that can resolve various issues, such as incorrect readings or malfunctioning buttons. To reset, remove the batteries from the device and wait for a few seconds. Reinsert the batteries, ensuring they are properly seated and the compartment is securely closed. This action will reset the thermometer to its default settings. Note that resetting will clear any stored memory readings, so ensure you have recorded any important data before proceeding. After resetting, the thermometer will be ready for use, and you can recalibrate it if necessary. Always refer to the user manual for specific instructions, as different models may have slight variations in the reset procedure. Proper resetting ensures optimal performance and accuracy.
6.3 Understanding Error Messages
Understanding error messages on your Safety 1st Thermometer is crucial for troubleshooting and ensuring accurate readings. The device may display an “H” when the measured temperature exceeds the maximum limit, such as 43°C/109.4°F in body mode or 99.9°C/211.8°F in object mode. This indicates the temperature is too high for safe measurement. Other error messages may appear due to battery issues or sensor malfunctions. Always refer to the user manual for specific error codes and their meanings. If an error persists, reset the thermometer or consult the manufacturer’s support. Addressing error messages promptly ensures reliable performance and accurate temperature readings for safe use. Regular maintenance can help prevent errors and extend the lifespan of your thermometer.
Maintaining Your Thermometer
Regularly clean the thermometer with a soft cloth and store it in a protective case. Replace batteries every 12 months or when low battery is indicated. Resetting the device ensures optimal performance and accuracy for reliable temperature measurements over time.
7.1 Cleaning the Thermometer
Cleaning the Safety 1st Thermometer is essential for maintaining its accuracy and longevity. Use a soft, dry cloth to gently wipe the exterior and sensor area. Avoid harsh chemicals, abrasive materials, or excessive moisture, as they may damage the device. For stubborn dirt, lightly dampen the cloth with water, but ensure no liquid enters the thermometer’s openings. Regular cleaning prevents bacterial buildup and ensures precise temperature readings. Never submerge the thermometer in water or expose it to extreme cleaning agents. Proper care will extend the device’s lifespan and maintain reliable performance for consistent temperature monitoring.
7.2 Storing the Thermometer
When not in use, store the Safety 1st Thermometer in a cool, dry place away from direct sunlight and moisture. Use the provided protective case to prevent scratches or damage. Ensure the device is turned off to conserve battery life. Avoid storing it in extreme temperatures, as this may affect its accuracy. Keep it out of reach of children to prevent accidental damage or tampering. For extended storage, remove the batteries to prevent corrosion. Store the thermometer in an accessible location, such as a medicine cabinet, for easy retrieval when needed. Proper storage ensures the device remains in optimal condition for future use.
7.3 Replacing Batteries
To replace the batteries in your Safety 1st Thermometer, first turn it off to avoid any electrical issues. Open the battery compartment, usually located at the back or bottom of the device. Gently remove the old batteries and dispose of them properly. Insert the new batteries, ensuring they are of the correct type and polarity as specified in the manual. Avoid mixing old and new batteries to maintain consistent power supply. If using rechargeable batteries, check compatibility with the device. Close the compartment securely to ensure proper function. For optimal performance, clean the compartment contacts with a soft cloth before inserting new batteries. Replace the batteries if the thermometer displays low power or erratic readings.
Historical Context of Thermometers
The invention of thermometers traces back to pioneers like Daniel Fahrenheit, who created the first practical thermometer. His scale, along with Celsius, revolutionized temperature measurement globally.
8.1 Evolution of Thermometers
The evolution of thermometers began with early mercury-in-glass designs, pioneered by Daniel Fahrenheit, who introduced the first practical thermometer. Over time, advancements led to the development of digital thermometers, offering greater accuracy and ease of use. The Safety 1st Thermometer represents this progress, combining reliability with user-friendly features. Historical innovations, such as the creation of the Celsius and Fahrenheit scales, laid the groundwork for modern temperature measurement. Today, thermometers like the Safety 1st model incorporate these scales, allowing users to switch between them effortlessly. This evolution reflects a commitment to precision and accessibility, making temperature measurement a vital tool for health and safety.
8.2 Contributions of Daniel Fahrenheit
Daniel Fahrenheit was a pivotal figure in the history of thermometers, inventing the first practical mercury-in-glass thermometer. His creation introduced a standardized method for measuring temperature, revolutionizing science and medicine. Fahrenheit also developed the Fahrenheit scale, which remains widely used today, particularly in the United States. His innovations laid the foundation for modern thermometers, including the Safety 1st Thermometer, which incorporates both Celsius and Fahrenheit measurements. Fahrenheit’s work ensured accurate and reliable temperature readings, making his contributions indispensable in fields requiring precise thermal measurement. His legacy continues to influence the design and functionality of contemporary thermometers, ensuring ease of use and adaptability for diverse applications.
8.3 Development of the Celsius Scale
The Celsius scale was developed by Swedish astronomer Anders Celsius in 1742, introducing a standardized method for temperature measurement. Initially, he reversed the scale, with water freezing at 100 degrees and boiling at 0 degrees, but it was later inverted. Celsius’s innovation provided a logical, decimal-based system, simplifying scientific communication. His work complemented Fahrenheit’s contributions, offering an alternative scale that became widely adopted globally. The Celsius scale’s clarity and precision made it vital for scientific and everyday applications, ensuring its inclusion in modern devices like the Safety 1st Thermometer, which offers dual-scale functionality. This development underscored the importance of standardized measurement in advancing technology and daily life.
The Safety 1st Thermometer offers reliable temperature measurement with easy switching between Celsius and Fahrenheit, ensuring accuracy and user convenience for all applications, making it a trusted choice.
9.1 Summary of Key Points
The Safety 1st Thermometer is a reliable tool for accurate temperature measurement, offering ease of use and essential features like memory recall and fever detection. It allows seamless switching between Celsius and Fahrenheit, catering to diverse user preferences. The device is designed with safety in mind, ensuring precise readings for both children and adults. Key functionalities include quick measurement, Fever Alert settings, and a clear LCD display. Its user-friendly design makes it ideal for parents and professionals alike. Regular maintenance, such as cleaning and battery replacement, ensures longevity. By following the provided instructions, users can maximize the thermometer’s efficiency and reliability for consistent health monitoring and well-being.
9.2 Final Tips for Safe Use
Always handle the thermometer with care to avoid damage. Ensure proper calibration before use for accurate readings. Store the device in a dry, cool place away from direct sunlight. Regularly clean the thermometer with a soft cloth and mild soap solution to maintain hygiene. Avoid exposing it to extreme temperatures or physical stress. Replace batteries promptly when low to prevent measurement errors. Familiarize yourself with the Fever Alert feature to monitor high temperatures effectively. Use the memory recall function to track temperature trends over time. Follow the manufacturer’s instructions for switching between Celsius and Fahrenheit to ensure correct readings. By adhering to these guidelines, you can ensure safe, reliable, and efficient use of your Safety 1st Thermometer for years to come.